
Passkeys are a replacement for your password and required for all Evangel employees. With passkeys, you can sign into your work or school account using your face, fingerprint, or PIN. Signing in with a passkey is simple, fast, and helps protect you against phishing attacks.
Please Note
- Multi-factor authentication (MFA) will need to be set first. Please see the related article below - "How to set up your Evangel account in the Microsoft Authenticator App"
- Employees will need to contact the Helpdesk at 417-575-5400 if they do not have a passkey already set, purchased a new mobile device, or removed the Microsoft Authenticator application from their device.
-
Bluetooth must be enabled on both your phone and your computer.
Setting up a passkey
- Open Authenticator
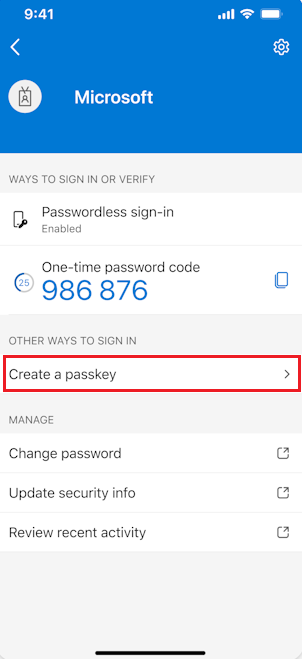
- Select your account.
- Under "Other ways to sign in," select "Create a passkey."
- Read the on-screen prompts.
- Select OK.
Signing-in with a passkey
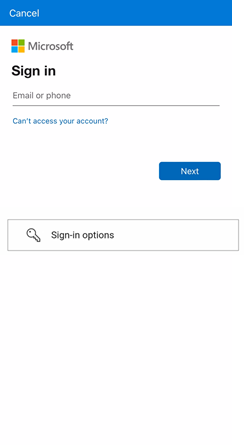
- When signing-in, select "Other ways to sign in."
- Choose "Face, fingerprint, PIN, or security key."
- Choose "iPhone, iPad, or Android device." Hit Next.
- A QR code should display. Open your Authenticator app.
- In the bottom-right of the app, there should be a blue button with a QR code icon. Press this button.
- Scan the QR code on your screen with this app feature.
- Hit Continue.
- Congratulations! You have securely signed-in using your passkey.
Instructions for Apple IOS
Open the Authenticator, select your account, and then tap Create a passkey.
You need to complete multifactor authentication (MFA).
If necessary, tap Settings and set up a screen lock.

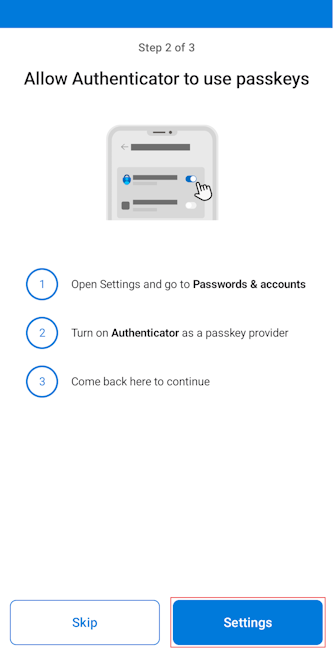
Tap Settings to enable Authenticator as a passkey provider.

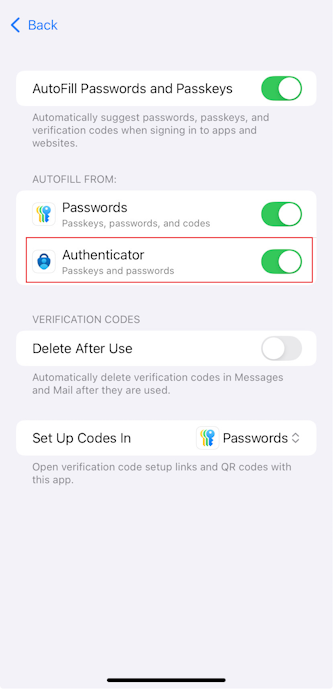
On your iOS 18 device, go to Settings > General > Autofill & Passwords. On your iOS 17 device, go to Settings > Passwords > Password Options.
On both operating systems, make sure that AutoFill Passwords and Passkeys is turned on. Under Autofill From, make sure that Authenticator is selected.
After you return to Authenticator, tap Done to confirm that you added Authenticator as a passkey provider.

Then you can see Passkey added as a sign-in method for your account. Tap Done again to finish.
Instructions for Android
Note: The steps to enable passkey providers on Android might vary based on the make and model of your device. Search for Passkey on your device settings or consult your device manufacturer for guidance. If your device runs Android 14 and you can't enable Authenticator as a passkey provider, we recommend that you upgrade to Android 15.
Download Authenticator from Google Play, open it, and go through the privacy screens.
Add your account in Authenticator on your Android device.
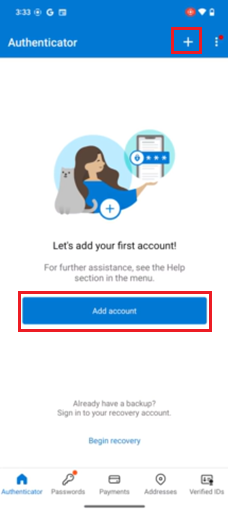
If you installed Authenticator for the first time on your device, on the Secure Your Digital Life screen, tap Add work or school account.

If you installed Authenticator on your device before but didn't add an account, tap Add account or the + button, and select Work or school account. Then tap Sign in.
If you already added an account in Authenticator, tap your account, and then tap Create a passkey.

You need to complete multifactor authentication (MFA).
If necessary, tap Settings and set up a screen lock.
Tap Settings to enable Authenticator as a passkey provider.
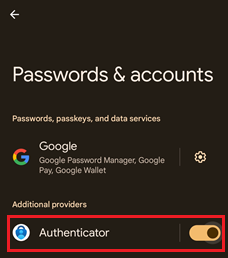
Open Passwords & accounts.
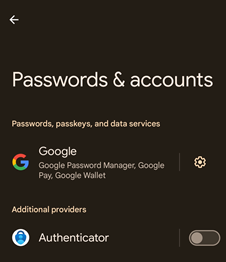
In the Additional providers section, make sure that Authenticator is selected.
After you return to Authenticator, tap Done to confirm that you added Authenticator as a passkey provider.
Then you can see Passkey added as a sign-in method for your account. Tap Done again to finish.
Register passkeys in Authenticator on Android and iOS devices - Microsoft Entra ID | Microsoft Learn
Comments
0 comments
Please sign in to leave a comment.